Our guides are always evolving. If you have a request for a guide, or if you find an issue with an existing guide, please
get in touch.
These guides provide step-by-step instructions to accomplish specific tasks within the system. They are designed to be practical and goal-oriented, helping you quickly achieve your desired outcome.
The following formatting conventions are used in How-to guides:
Numbered lists: Indicate sequential steps.
Code snippets: Display code or configuration examples.
Screenshots: Provide visual guidance.
Callouts: Highlight important information or warnings.
1 - How to Avoid Outdated Configuration
Managing configuration across versions of a module can result in unexpected challenges.
Sometimes, in the process of making successive configuration changes, we need to maintain old configuration files so that outdated update hooks can still run successfully for sites that are running a module that might be many releases behind.
When a new update runs into an error like:
Configuration ______ depends on the ______ configuration that will not exist after import.
the error most often means that some configuration that’s expected in a prior update hook has been removed from the codebase. This can also happen when configuration schema changes.
In order to enable our modules to move quickly and minimize the need for developers to
stop their update process at important versions, we have come up with a process of retaining “outdated” configuration when necessary. This often involves creating a new directory to house the older configuration files.
Overview
This process results in a configuration directory that looks like this:
When you encounter this error, follow these steps:
Identify the culprit: Find the version of the module where the failing update hook was committed.
Isolate the code: Checkout or download the old version of the module to a separate working directory.
Preserve the config: Copy all the configuration files that are being imported in that update hook into a new directory, such as config/outdated/x.x.x. Name the directory to clearly indicate the module version that the configuration pertains to. Consider creating a README.md file inside this directory to document its purpose and the specific module version it supports.
Adapt the path: Modify the $path line in the failing update hook, changing /config/optional to /config/outdated/x.x.x.
Test thoroughly: Commit these changes and test them thoroughly to ensure the update hook now runs successfully and doesn’t introduce regressions.
Warning Signs
While the error message described above is the most direct indicator of an issue, it’s better to prevent these errors proactively.
Consider also using the
Configuration Update module to identify configuration changes between the default configuration and the active configuration on your site.
Adding or removing major features or fields can also lead to this type of error. Be particularly cautious when:
Removing configuration entities.
Changing configuration schema (e.g., renaming properties, changing data types).
Introducing dependencies on new modules in configuration.
2 - How to customize your locations map
YMCA Website Services includes robust mapping functionality defined in the
openy_map subproject. Maps are typically displayed on the /locations page using the
Location Finder component and are highly customizable.
Here are a few common customizations:
Changing Map Options
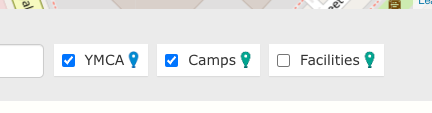
By default, content types have these labels on the map:
Branch = YMCAs
Camp = Camps
Facility = Facilities
These labels can be customized in the Drupal administration pages to better suit your YMCA’s member-focused terminology. To do so:
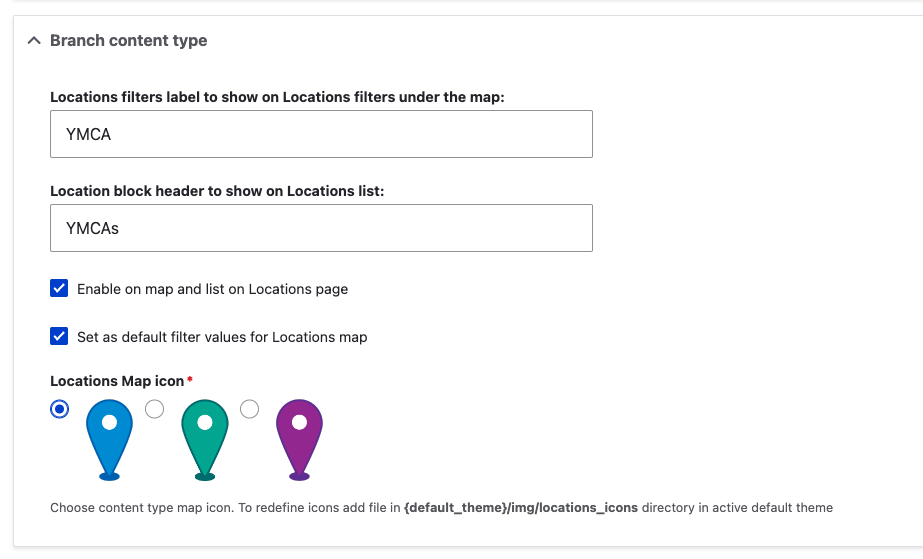
In the Admin Menu, go to YMCA Website Services (or Open Y on prior versions) > Settings > Map Settings.
In the Branch/Camp/Facility Content Type sections, you can:
Edit the label names.
Show or hide the content type on the Locations page.
Set the filter to be on or off by default.
Set the map icon.
Edit each content type as needed, then Save the form.
Reload /locations to see your changes.
Adding Additional Location Types
You can add new content types to the map with a few steps. This may require some trial and error, so be sure to work in a testing environment first. The Field UI module must be enabled to do this through the Drupal admin UI.
Create a new content type via Structure > Content types > Add content type.
Add these existing fields to the content type:
field_location_coordinates - Required
field_location_address and field_location_phone - Suggested for display on the map and location teasers.
field_location_amenities - If the location should be searchable with the Amenities search.
Set up the Teaser display on the new content type:
Navigate to Manage display then Teaser.
Update these settings to match the Branch Teaser display at /admin/structure/types/manage/branch/display/teaser.
Go back to the Map Settings at admin/openy/settings/openy_map and configure the options for your new location type.
3 - How to install Cachet (the official Y Font)
Cachet, the Y’s primary font, should be used for all internal and external materials whenever possible.
Typography is an important element of our brand identity. Cachet and Verdana, the only two fonts used on YMCA collateral, help provide our words with a distinctive look and welcoming feel. And Cachet, as our primary font, should be used for all internal and external materials whenever possible.
To help Ys incorporate the Cachet font into their online applications, Y-USA is now licensing the web font version of Cachet for all YMCAs. Previously, Ys could only access the desktop version of the font from the Brand Resource Center (BRC).
YMCA development partners can take advantage of a custom module which allows for automation of this process.
Get in touch or reach out in #developers on the YUSA Slack for more details.
For site builders
Once you’ve downloaded the WOFF files, you’ll need to add them to your site. These instructions mirror the
walkthrough in this video.
These steps leverage the @fontyourface module. Ensure this module and the @fontyourface - Local Fonts module are enabled before proceeding.
Visit Admin > Extend and ensure the “@fontyourface” and “@fontyourface - Local Fonts” modules are enabled.
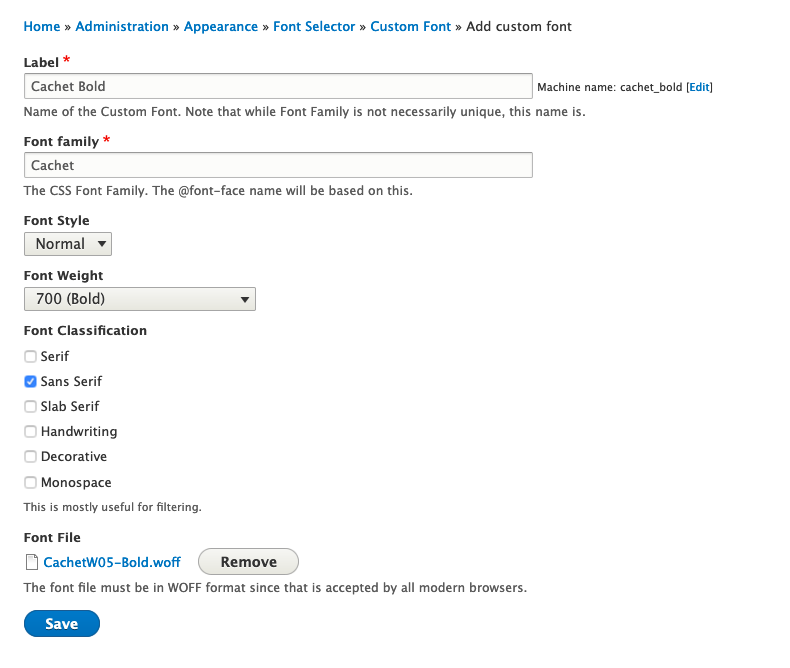
Click + Add Custom Font and add each of the Cachet font files you downloaded above with the following settings:
Label
Font Family
Font Style
Font Weight
Font Classification
Font File
Cachet Extra Light
Cachet
Normal
300
Sans Serif
CachetW05-ExtraLight.woff
Cachet Book
Cachet
Normal
400
Sans Serif
CachetW05-Book.woff
Cachet Medium
Cachet
Normal
500
Sans Serif
CachetW05-Medium.woff
Cachet Bold
Cachet
Normal
700
Sans Serif
CachetW05-Bold.woff
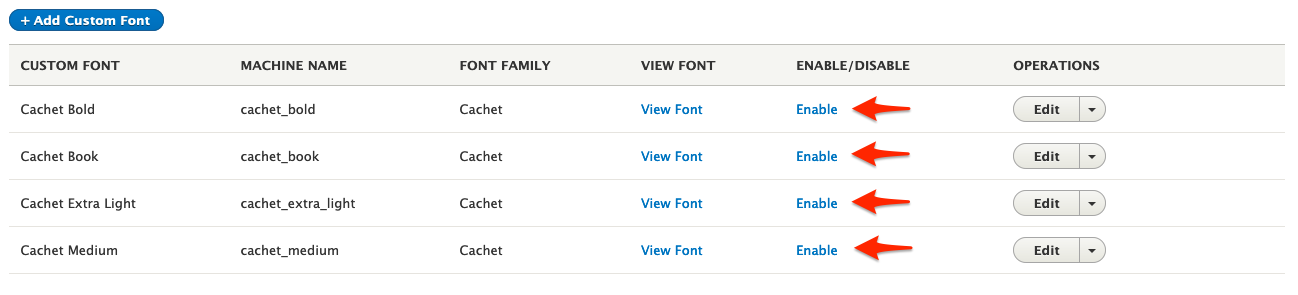
After you’ve added each font, Enable them.
Your site should now use the Cachet font in headers and other areas. Usage is dependent on the YMCA Website Services theme you choose.
4 - How to integrate with social media
Embedded social feeds or posts can help share your message with users.
Social media is a great platform for communicating with your community, and it’s often helpful to embed feeds or posts on a page to share topical content with users.
The distribution has used several methods over the years to add social content to sites, but all of them are dependent on the specific platforms maintaining open APIs. Unfortunately, many social networks are now locking down and restricting their APIs.
How to embed social content on your website
Currently, we recommend using embed codes from the specific platform to embed social posts or feeds on your YMCA Website Services website.
Find the embed code
Each platform has its own way of doing embeds. For posts, you can often find an “Embed” button in the options or share menu. For feeds, you often need to use a separate builder. Here are some options we’ve found:
Note: Social platforms may break these embeds at their whim. Use at your own risk.
Embeds using Paragraphs
Navigate to a content page on your site, then click Edit.
Add a
Code Paragraph to the section where you’d like to do the embed.
Paste in the embed code generated above.
Save the page.
Embeds using Layout Builder
Navigate to a content page on your site, then click Layout.
Add a
Code Block to the section where you’d like to do the embed.
Paste in the embed code generated above.
Save the block, then Save layout on the page.
Alternatively, try Social Feeds Fetcher
The
Social Feeds Fetcher module allows your site to import social media content for syndication. This module fetches social feeds from Facebook, Twitter, and Instagram, and aggregates them into a content type.
To configure fetching:
Open the configuration page at /admin/config/social_feed_fetcher_settings or Configuration > Web Services > Social Feed Fetcher Settings.
Select the checkbox for your chosen social networks and add additional settings. Every social network has its own API and requires different configuration.
When all settings are completed, click Run Cron. The import is started, and if the configuration is correct, items will appear in the content list.
The Social Feed Fetcher module includes the following features:
Social Post Content Type: A content type specifically designed for social media posts, including fields for the post text, link, image, and platform.
Views Integration: Provides a pre-configured View to display and administer social post content at /admin/social-posts.
Field Mapping: Maps fields from social media APIs to the Social Post content type fields.
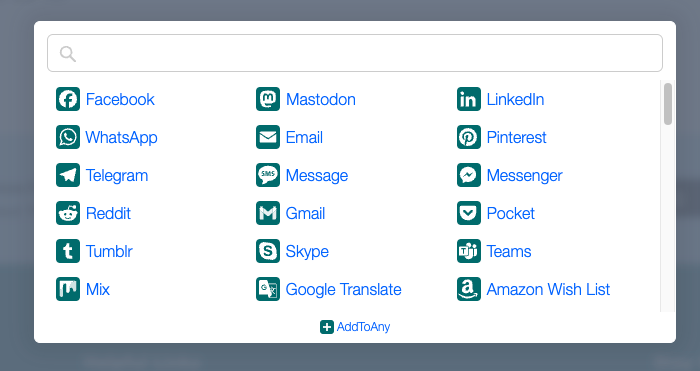
How to share content from your site to social media
All mobile browsers — Firefox, Edge, Safari, Chrome, Opera Mini, UC Browser, Samsung Internet — make it easy to share content directly from their native platforms.
AddToAny is the perfect drop-in replacement for AddThis.
The
AddToAny module is included in the YMCA Website Services distribution. It is not enabled out of the box, but if you need to supplement native platforms’ sharing services, here’s how:
Go to Admin > Extend (/admin/modules) and enable the AddToAny module.
Configure the module at Admin > Configuration > Web Services > AddToAny (/admin/config/services/addtoany)
Edit a single Page Layout or the Content Type Layout.
Decide where to add the share block. We recommend the right side of the footer, above or below the “Stay Connected” block, but any section of the page would work.
In Layout Builder, Add block, then choose All system blocks > AddToAny share buttons.
Set a Title like “Share this”.
Choose to Display title.
Leave other configuration as their defaults.
In the Style settings, expand Spacing and add a top or bottom margin of 32px to ensure the block is spaced properly from the block above or below it.
Layout Builder components for YMCA Website Services were developed and released throughout 2023. The initial plan was to support Paragraphs-based components for one year after the Layout Builder components were completed, after which they would no longer be supported. Site owners can begin migrating their content at any time. After the deprecation of Paragraphs components, they will not “disappear”, but the YMCA Website Services core team will no longer support them.
As of October 2023, the timeline is:
December 2023 - Layout Builder components are considered “feature complete.”
2024 - Refinement and bug fixing of Layout Builder components; basic bug fixing only for Paragraphs components.
December 2024 - End of support for Paragraphs components.
Site owners are encouraged to plan a migration of their content to Layout Builder in 2024, after which they will be responsible for maintaining Paragraphs components.
(Timeline is subject to change based on community feedback and priorities.)
Plan your migration
The migration from Paragraphs to Layout Builder is not a small one, but it can be done in manageable pieces and spread out over time if necessary. We recommend working with a
partner agency to assist you through the process.
TIP: As you work through the migration, the new pieces of your site will look different than others. Help members through the process with some messaging in an
Alert or
news post letting them know that things will be changing.
Decide where to start
If you’re doing your migration throughout your regular business, without starting from scratch (sometimes called a “lazy migration”), it helps to identify a strategy for planning the migration. These are a few possible strategies:
A campaign or goal
If you have an upcoming marketing campaign, you could build one or a few brand new Landing Pages with Layout Builder to try out the process. This way, you’re easing both your editors and members into the new designs without getting too deep.
If you have a natural pause in events (maybe over a holiday) or a big series coming up, you could use that as the break point for new events. Old events don’t necessarily have to be converted to the new design, as they’re not often viewed after their date has passed.
A section of the site
Maybe you want to ease into the process with some lesser-used pages, or maybe you want to change the home page and top-level menu items to show off the new designs right from the outset. Either way, you can decide on a section and carve off a few pages at a time.
A content type
Events or News articles are a good option to try out the new designs, although you’ll need to ensure any Landing Pages that display lists of that content are also updated. Branch pages can be converted one by one without changing their listing on the Locations page.
Prepare your content
Once you know what you’re going to move, you’ll want to get the content ready to migrate. Most text will need to be copied and pasted to the new pages (this is a great opportunity for review), but images and documents can be re-used from the
Media Library.
It could be helpful to print or screenshot pages (Firefox can capture a
full-page screenshot) and then annotate them to decide how each section of the page will map to its Layout Builder component. You could even use the
Wayback Machine to save a snapshot of the page.
Component mapping
While the exact mappings are up to each site’s content editors, here are some possible mappings from Paragraphs to Layout Builder. Note that available Layout Builder components may vary based on your specific YMCA Website Services configuration.
Paragraph
The Layout Builder component it maps to.
1 Column
2 Columns
3 Columns
4 Columns
Secondary Description and Sidebar
These paragraphs can be replicated using 1-4 column
Layouts
Once you have a plan, go build it! Use the
Layout Builder documentation to help you through the process. Building each page might look something like this:
Create a new, unpublished, Landing Page (with Layout Builder).
Add blocks and content to the new page.
Ensure the URL Alias of the new page matches that of the old page.
Un-publish the old page and publish the new page.
Test out the new page in a new browser, an incognito window, or your phone or tablet.
Get help
If at any point in this process you need help, be sure to reach out to
our community. The functionality is always being improved, and we have a wide variety of developers and builders from other Ys who are happy to help.
6 - How to perform a content audit
Content audits help get an overview of how your site is structured and can assist with migrations, SEO analysis, and more.
Doing a content audit is a useful first step in planning a migration or a larger content strategy initiative. A content audit helps you understand the current state of your website, identify areas for improvement, and make informed decisions about your content.
List all current website pages in a spreadsheet, organized by menu section or information architecture.
This will give you a visual overview of how your site is structured.
Be sure to audit your Drupal Admin back end for unpublished pages that can be removed or deleted!
Review
Visit each page and review the content.
Identify key pages and content types.
Locate content that is outdated, duplicated, needs further review, or could benefit from consolidation.
Find content gaps and identify what might be missing.
Identify commonly used page components (i.e., Cards, Carousels, Accordions).
Note the text formats being used. Text formats are managed by the core Filter module and define how text is filtered and displayed. See the
Managing text filters and text formats help topic for more information.
Additional Resources
For more information on content audits, check out these resources:
If you are starting with an internal toolchain, run composer require ycloudyusa/yusaopeny at the root of the project.
Go to Admin > Configuration > Basic site settings and configure the website name and slogan.
Enable Layout Builder Modules
The core functionality of the Layout Builder features is packaged inside the
Y Layout Builder module (y_lb). This module is required by the profile and comes with it out of the box.
Layout Builder modules might be disabled by default. The complete
list of available components is available in y_lb/composer.json. There are two different methods to enable them:
To install only selected modules: Go to Admin > Extend (/admin/modules) and enable only the components that you choose to use.
To install all the modules: Go to Admin > YMCA Website Services > Extend > Install (/admin/openy/extend/list). Check the box for Layout Builder, then Install.
Configure Layouts & Listings
Layout Builder relies on a system of
Layout Defaults and
Layout Overrides. An important concept to understand from these pages is:
Once a Layout is overridden on an entity, that entity will not be impacted by changes to Layout Defaults.
When building Landing Pages, you will override the Default Layout for every page by placing content blocks. For this reason, it is important that you configure the desired defaults before building pages.
Configure its
content type styles at /admin/structure/types/manage/landing_page_lb/display first. Configure:
Colorway
Border style
Border radius
Text/button alignment
Button position
Button fill
Locations
You will use the
Branch,
Camp, and
Facility content types to build pages that contain the contact and amenity details for each location.
For new sites, you may set the Use Layout Builder checkbox to be true by default at /admin/structure/types/manage/branch/fields/node.branch.field_use_layout_builder.
Configure the default layout and settings for each type on their corresponding layout settings pages:
Enable openy_node_session, openy_node_program, openy_node_category, openy_node_activity, and openy_node_class to set up the Program Event Framework (PEF) if you plan to use Schedules or Activity Finder on the project.
By default (as of September 2024), Layout Builder content is only editable by the Administrator user. In order for Layout Builder to be used by the Contributor or Editor Roles (or any custom roles), a number of permissions must be set. To get started, go to Admin > People > Permissions (/admin/people/permissions).
This list contains the relevant permissions for using Layout Builder in the YMCA Website Services distribution (out of the box). Assign permissions to roles on your site based on your individual content workflows.
In this Permissions Section…
assign these permissions.
Layout Builder - These permissions allow users to use “layout overrides” (aka the “Layout tab”), which is how pages are composed with Layout Builder.
Either give permission for all content types:
Configure any layout - will give permission to edit layouts for ALL content types
Or give permission to only specific content types:
Content - {Content Type}: Configure all layout overrides
Create and edit content blocks is required for anyone who needs to build Layout Builder pages.
Block content - These permissions allow users to create, edit, delete, or revert specific block types.
Either give permission for all block types:
Administer block content
Or, give permissions to only specific block types:
8 - How to set up a site with the Small Y template
The Small Y template is a set of modules and themes tailored to the needs of Small YMCAs.
What is the Small Y template?
The Small Y template is a pre-configured set of modules and themes designed to meet the specific needs of Small YMCAs. It provides a lightweight and user-friendly solution for small organizations requiring a simple and effective website. The Small Y template is based on the
YMCA Website Services distribution and built using
Y Layout Builder.
The Small Y template incorporates updates to the Layout Builder design system, a collaborative effort between VML and the YMCA of the USA. A visual representation of the new theme is available as a
mockup in Figma.
Essential Modules
The Small Y template is built with a curated selection of modules that are essential for a basic YMCA website. This streamlined approach simplifies setup and maintenance while minimizing the website’s overall footprint.
Alerts feature a new set of styles aligned with the colorway color scheme.
Small Y Specific Features
The Small Y template includes features tailored to simplify setup and maintain content consistency for small organizations:
Limits have been implemented on the number of items for the main menu and various components.
Breadcrumbs are automatically enabled on all pages.
The
Banner block offers additional variants, each compatible with the colorway color or a grey background:
Tall - Designed for use as the primary hero banner on a page.
Sub-page chevron - Suitable as a secondary banner.
Sub-page chevron (no media) - A secondary banner option without media.
Sub-page frame - A secondary banner that uses dark text on a white background.
Promo - A smaller banner option for use on pages needing a call to action with no media.
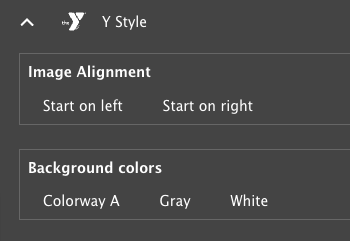
Ping-pong blocks can be added to sections using the Ping-pong Section content block. This simplifies adding alternating content blocks with section-level formatting, rather than formatting each block individually.
When adding a Ping-pong Section, two sets of options can be configured under Styles > Y Styles:
Image Alignment - Choose whether the image starts on the left or right.
Background colors - Select a colorway, white, or grey background for items within the section.
Statistics blocks have been redesigned, and include the option for grey or colorway backgrounds.
Grid CTA blocks now have CTA buttons positioned between the subheading and the items.
Icon Grid blocks position the CTA below the items.
Install the Small Y template
The Small Y template can be installed using either the YMCA Website Services Installation wizard or the command line.
Installation Wizard: This web-based tool provides a guided, step-by-step process for setting up a new YMCA website.
During the installation process, select “Small Y” as the Installation Type.
After installing the Small Y template, you can begin building your site by adding content and configuring the layout. Refer to
How to set up a Layout Builder site for detailed instructions.
9 - How to track & analyze user actions
Google Analytics
YMCA Website Services uses the Drupal contrib
Google Analytics module to enable
Google Analytics tracking on your YMCA Website Services site. The Google Analytics module adds a JavaScript tracking code to every page.
To get started, you should first create a GA property. Use the
Analytics Help for assistance.
Configuration
Configuration is done at the standard module configuration page: /admin/config/services/google-analytics.
The Google Analytics module settings include:
Web Property ID: Your Google Analytics account number.
What are you tracking?: Options include “Single domain”, “One domain with multiple subdomains”, and “Multiple top-level domains”.
List of top-level domains: Only relevant if you are tracking “Multiple top-level domains”.
Visibility: Settings for adding tracking to specific pages and/or roles.
Links and downloads: Options for tracking outbound links, mailto links, telephone links, and file downloads.
File extension list: A comma-separated list of file extensions to track as downloads.
Privacy: Options for anonymizing visitor IP addresses.
Custom variables: Settings for custom dimensions and metrics.
Custom code snippets: Allows you to add custom JavaScript code snippets.
Cache: Options for locally caching the Google Analytics JavaScript file.
Debug: Loads the debugging code of Google Universal Analytics.
In the
9.2.11 release in November 2021, YMCA Website Services
added support for Google Analytics 4. If your site has been updated to YMCA Website Services 9.2.11 or greater AND the google_analytics module has been updated to 4.x you should be able to use GA4. Otherwise you’ll need to stick with GA3.
Search Tracking with Google Analytics
Prerequisites
A Google Analytics account to track your site should be created.
The Google Analytics contrib module should be enabled and configured to use an existing GA account.
Steps
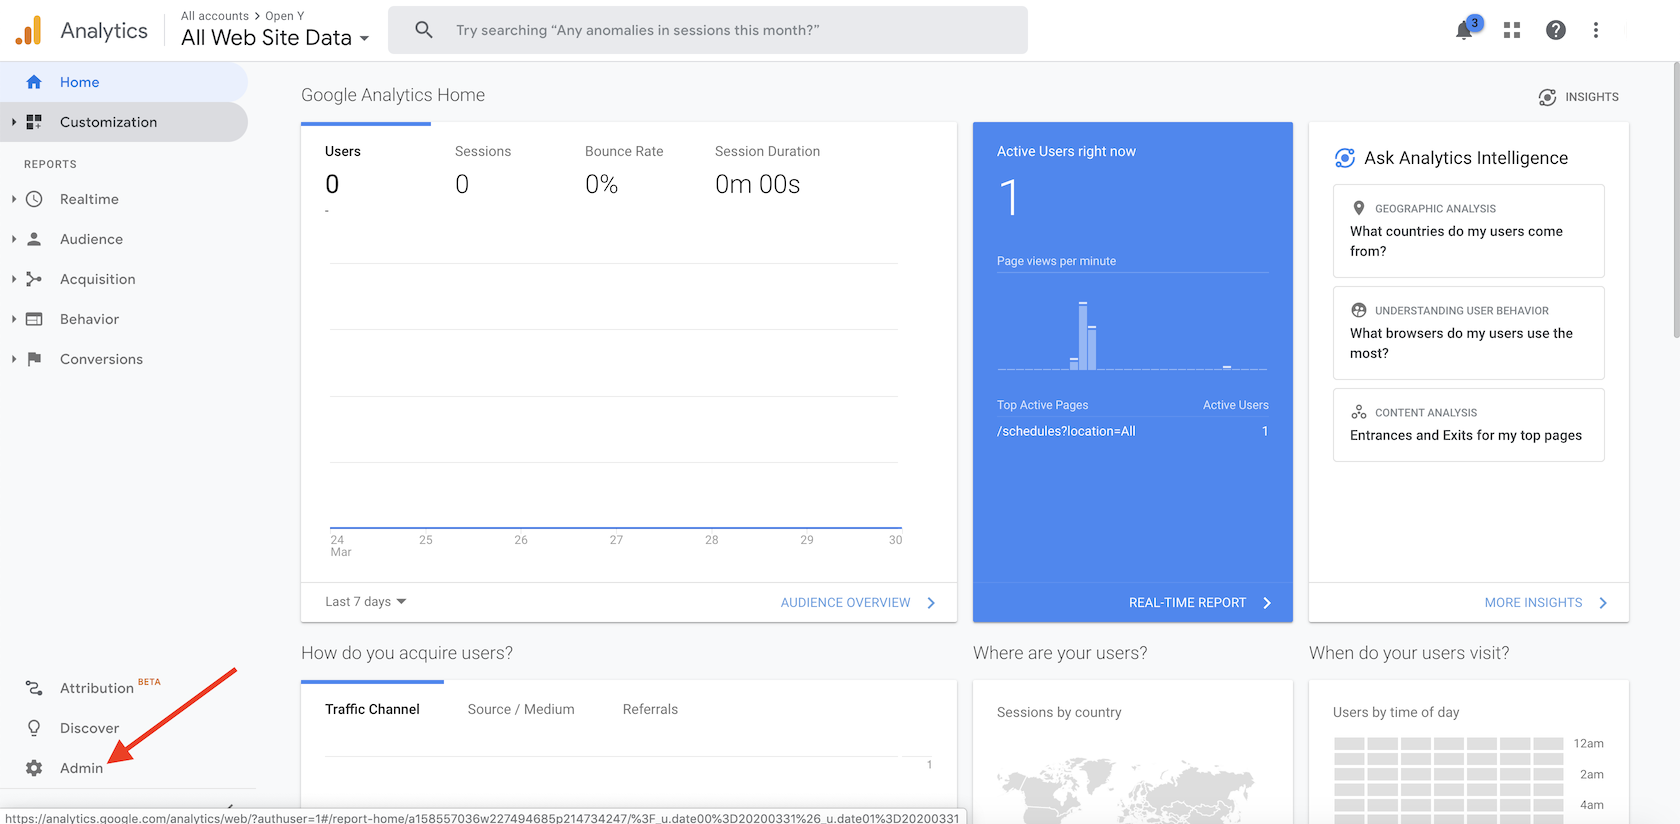
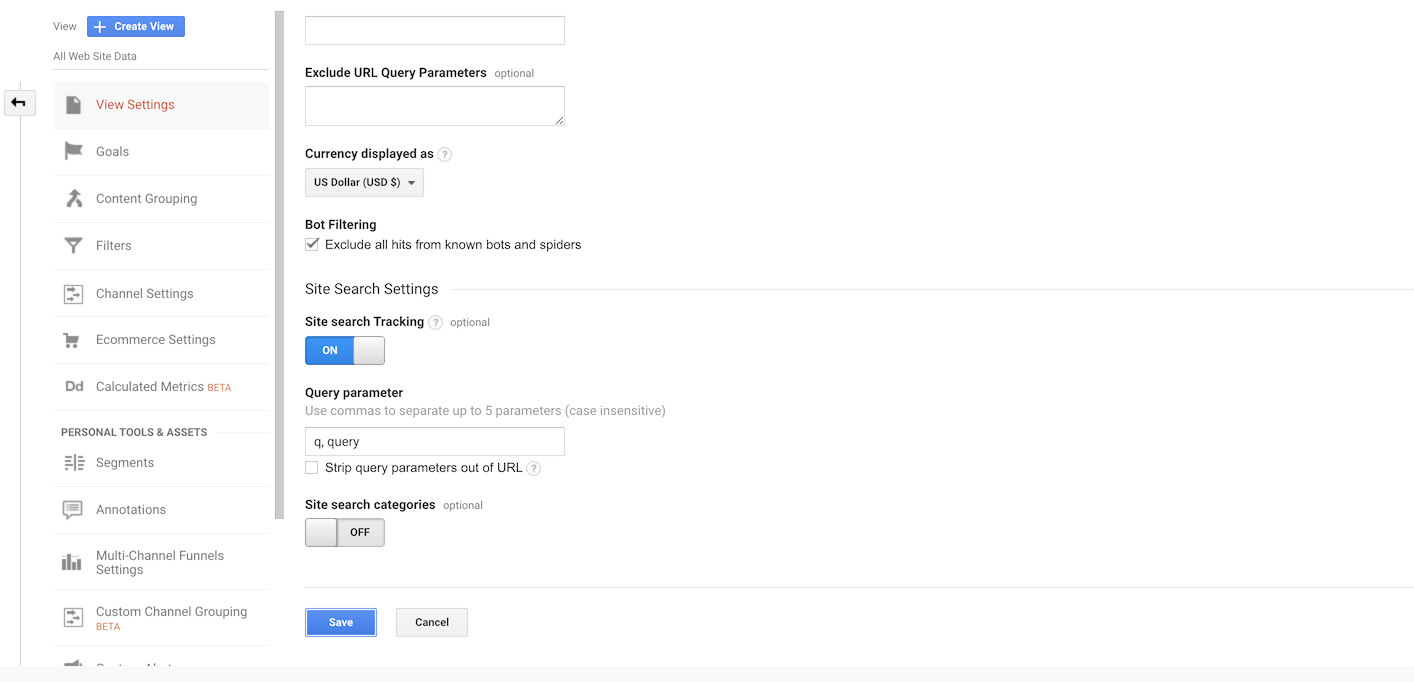
Log in to the Google Analytics account configured to track your YMCA Website Services site.
Click the Admin button in the bottom right corner of the main screen.
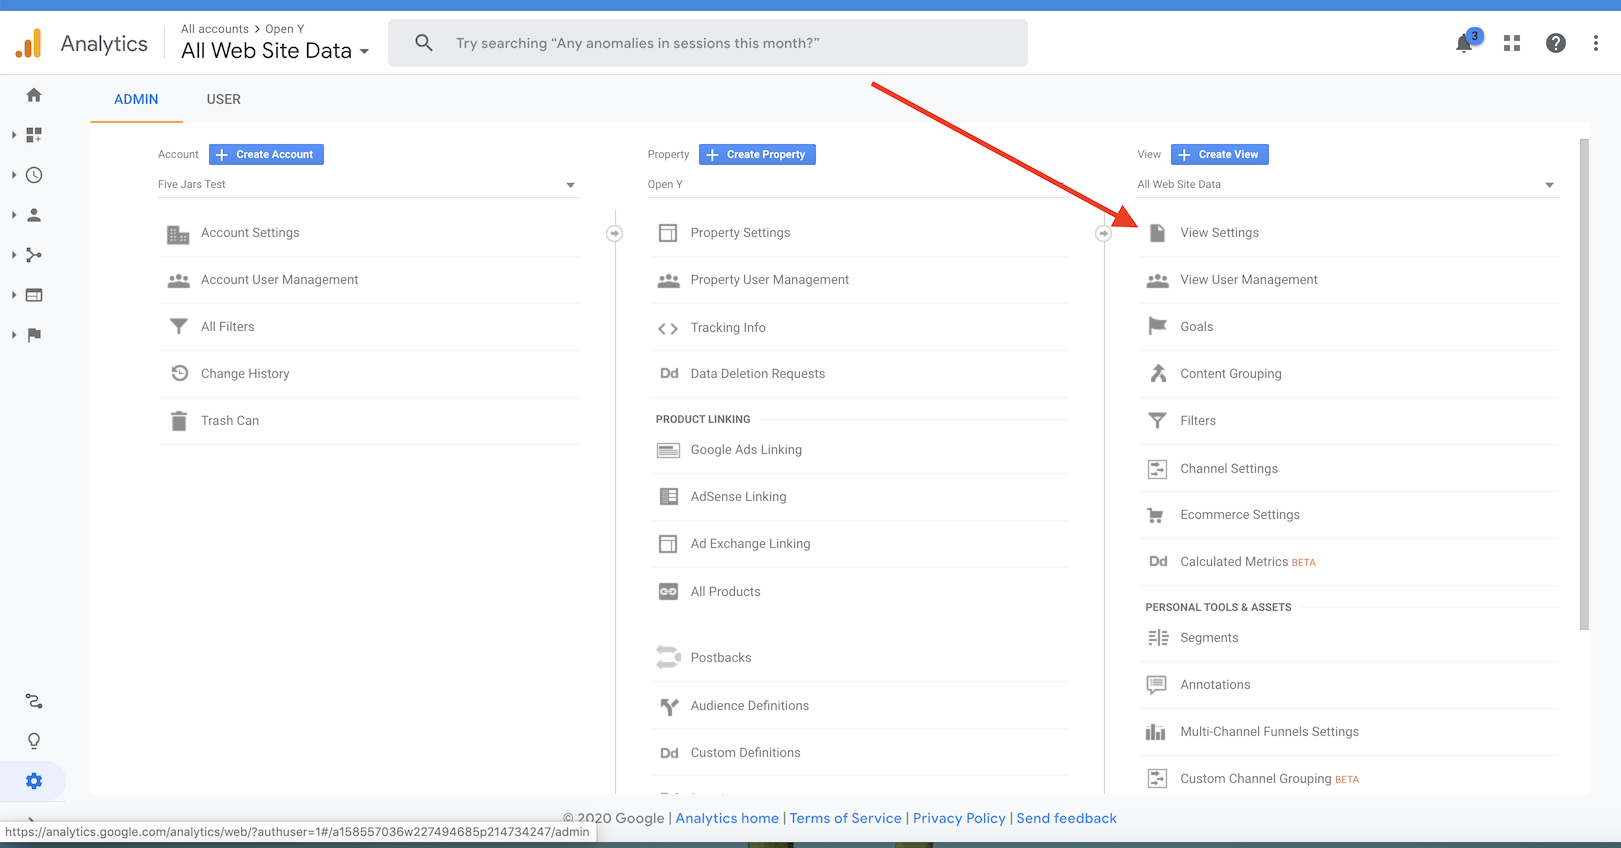
Click View Settings.
Scroll to the “Site Search Settings” section and enable the “Site Search Tracking” switch.
Fill the query parameter field with q, query values and click Save.
Reports about the search tracking can be found on the main screen in Behavior → Site Search Section.
Attention: Data processing latency for search tracking reports is 24-48 hours (see
Google’s support doc).
The Data Layers module outputs data on the page in a JSON format. By default, it will output properties (langcode, vid, name, uid, created, status, roles) and related taxonomy for any node, user, or any route-based entity.
A limited set of properties are available via the Data Layers configuration form at /admin/config/search/datalayer (langcode, vid, name, uid, created, status, roles).
Adding additional properties can be done through the use of hook_datalayer_meta().
Altering which properties will be output can be done via hook_datalayer_meta_alter().
/**
* Implements hook_datalayer_meta_alter().
*/functionmy_module_datalayer_meta_alter(&$properties){// Override module norm in all cases.
unset($properties['entityUid']);// Specific situation alteration...
$type=FALSE;if($obj=_datalayer_menu_get_any_object($type)){if($type==='node'&&in_array(['my_bundle','my_nodetype'],$obj->type)){// Remove author names on some content type.
if($key=array_search('name',$properties,TRUE)){unset($properties[$key]);}}elseif($type==='my_entity_type'){// Remove some property on some entity type.
if($key=array_search('my_property',$properties,TRUE)){unset($properties[$key]);}}}}
Adding additional data can be done using datalayer_add().
/**
* Add data to the data layer.
*/function_my_module_myevent_func($argument=FALSE){if($argument){datalayer_add(['drupalMyProperty'=>$argument,'userAnotherProperty'=>_my_module_other_funct($argument),]);}}
To alter the data to be output use hook_datalayer_alter().
/**
* Implements hook_datalayer_alter().
*/functionmy_module_datalayer_alter(&$data_layer){// Make the title lowercase on some node type.
if(isset($data_layer['entityBundle'])&&$data_layer['entityBundle']==='mytype'){$data_layer['entityLabel']=strtolower($data_layer['entityLabel']);}}
Cross-domain Tracking
This configuration enables cross-domain tracking (also known as “cross-domain measurement”) to work through internal redirects like those in
Membership Calculator (that use TrustedRedirectResponse).
When enabled, cookies matching any configured tag will be added to any redirect destination matching a configured domain. For example, a redirect to https://example.com will be transformed to https://example.com/?_gl=.....
Analytics provides code that does this automatically with standard <a> links, but this module is required to enable similar functionality with “server-side” links/redirects.
NOTE: Configuration and testing of analytics is required outside the scope of this module, refer to
[GA4] Set up cross-domain measurement for more information.
Successful cross-domain tracking also requires the destination application to retain the passed query strings and load them into the corresponding tracking property.
Requesting cross-domain tracking support
Many Customer Relation Management (CRM) systems and Member Management Systems integrate with YMCA websites. Those systems often need guidance on how to maintain cross-domain tracking support.
Entrance to the CRM/MMS often involves multiple redirects which may drop the required query strings.
When discussing cross-domain support with your vendor, we recommend requesting:
Please support passing query strings/parameters through redirects, specifically maintaining the _gl parameter.
You may also need to request that your GTM/GA code be added to the CRM/MMS to report back these parameters.
Configuration
Enable the “YMCA Website Services Cross-domain Tracking (XDT)” module at Administration > Extend, or via Drush:
drush en openy_xdt
Configure the module at Administration > YMCA Website Services > Settings > Cross-domain Tracking Settings (/admin/openy/settings/xdt).
The cookie defaults to the standard for GA4 but can be modified for use with different systems.
The module will not have any effect until a domain is configured. Add the domains of any external sites where you would like to enable tracking.
10 - How to leverage structured data
Structured data helps the machines reading your site - search engines, AI models, and more - understand your content.
Adding structured data can enable search results that are more engaging to users and might encourage them to interact more with your website
Press Release →
Article (there is currently no other appropriate Schema)
Customizing Articles
This mapping is set in code (y_lb_article_metatags_alter in
y_lb_article.module), but all other settings are configurable via the Metatag configuration (/admin/config/search/metatag/node__article_lb).
Any time the Branch Hours are updated, that content will also be reflected in the Structured Data that’s read by search engines.
Customizing Branches
The mapping is configurable in the Metatag configuration (/admin/config/search/metatag/node__branch). Hours configuration uses the
Open Y Hours_metatag tokens.
If an Accordion section contains Frequently Asked Questions, check the FAQ? checkbox to output them as structured data.
Tips for writing good FAQ content:
Ensure the content contains individual sets of questions (“How old does my child need to be to swim at the YMCA?”) and answers (“The YMCA offers swim classes starting at age 3 and the pool is open to children of all ages with parental supervision”).
Only one FAQ should be added to a page. If more than one is added, only the first will be output to the structured data. See
Google’s Content guidelines for FAQs for more information.
Customizing FAQs
Due to the complexity of the FAQ data, the structured data is
managed entirely in code and is not customizable via the Drupal admin. If you need specific customizations, please post your ideas in Slack or suggest them on
the Roadmap for the core team to discuss and implement.
Other Metatags
The distribution also includes metadata configuration for each content type, which can be found in the Metatag configuration (/admin/config/search/metatag). Refer to the
Metatag module documentation for more information.
Homepage Metatag Overrides
On some sites, the homepage may have unique metadata requirements. The homepage metatags can be overridden in the “Front page” metatag configuration.
For sites that use Layout Builder, it may be necessary to disable the Front Page metatag settings so that the Landing Page (Layout Builder) tags can be used instead.
Go to /admin/config/search/metatag/front
Scroll to the bottom of the form.
Uncheck Active and Save the settings.
Once you have changed the settings, check the metadata of the homepage with a tool like
Social Share Preview to ensure the correct data is being output.
11 - How to use the Canadian Colourway for Layout Builder
With a few clicks, Canadian YMCAs can use their own set of brand-compliant, accessible styles.
YMCA of the USA has partnered with
YMCA Canada to create a brand-compliant and accessible colorway for use by Canadian YMCAs. This allows Canadian YMCAs to easily implement their specific branding requirements within the YMCA Website Services platform.
Designs
The colorway is packaged as the
Canada Layout Builder Colorway module on Drupal.org and is included with the full
YMCA Layout Builder package. The ws_colorway_canada module provides colorways, logos, and banner styles approved by YMCA Canada. It also depends on the y_lb (YMCA Layout Builder) and responsive_favicons modules.
The Canada Layout Builder Colorway includes the lb_hero_canada submodule, which provides helper functionalities for the Canada variations of the Hero Banner block type.
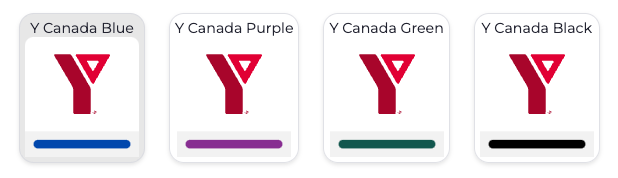
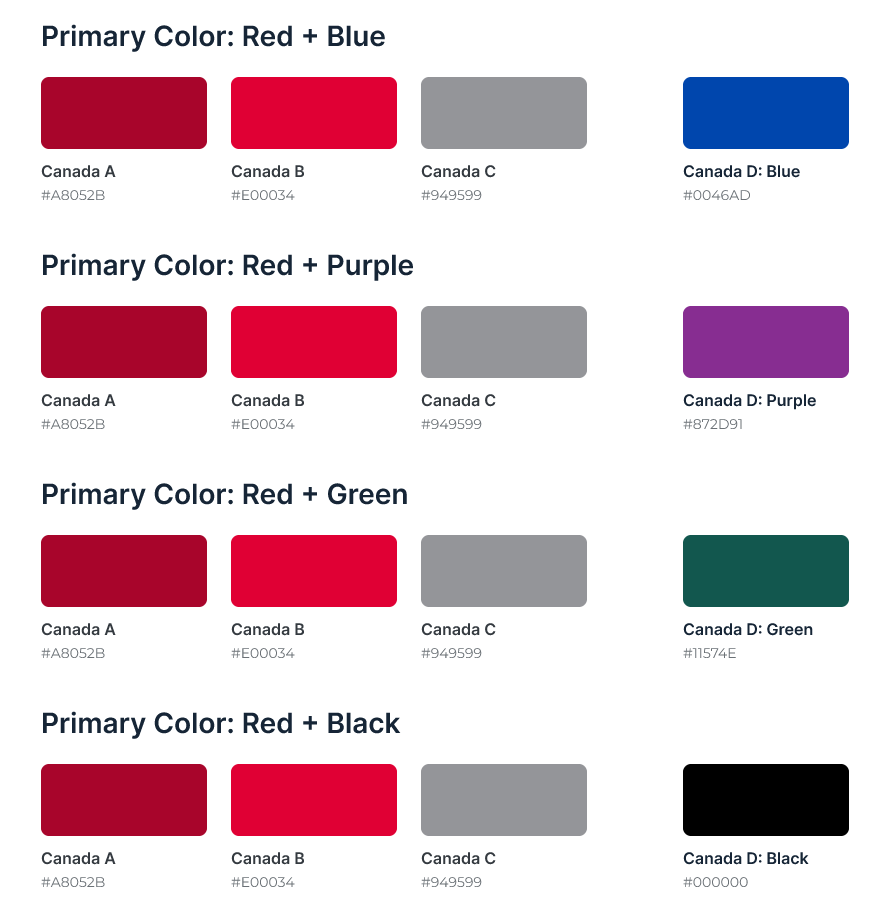
The Canadian Colorway package includes four options for content type or page-level colorways: Y Canada Blue, Y Canada Purple, Y Canada Green, and Y Canada Black. Each colorway uses the same three primary colors - dark red, lighter red, and grey, along with a highlight color of blue, purple, green, or black.
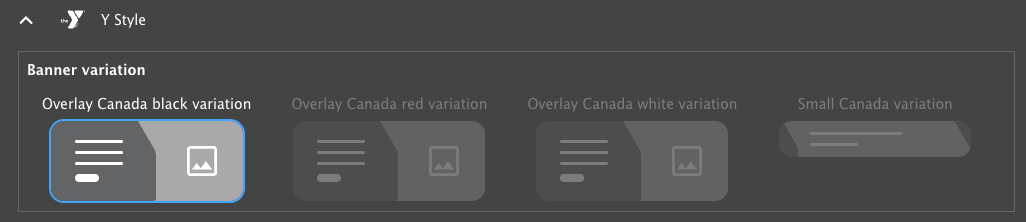
Banners
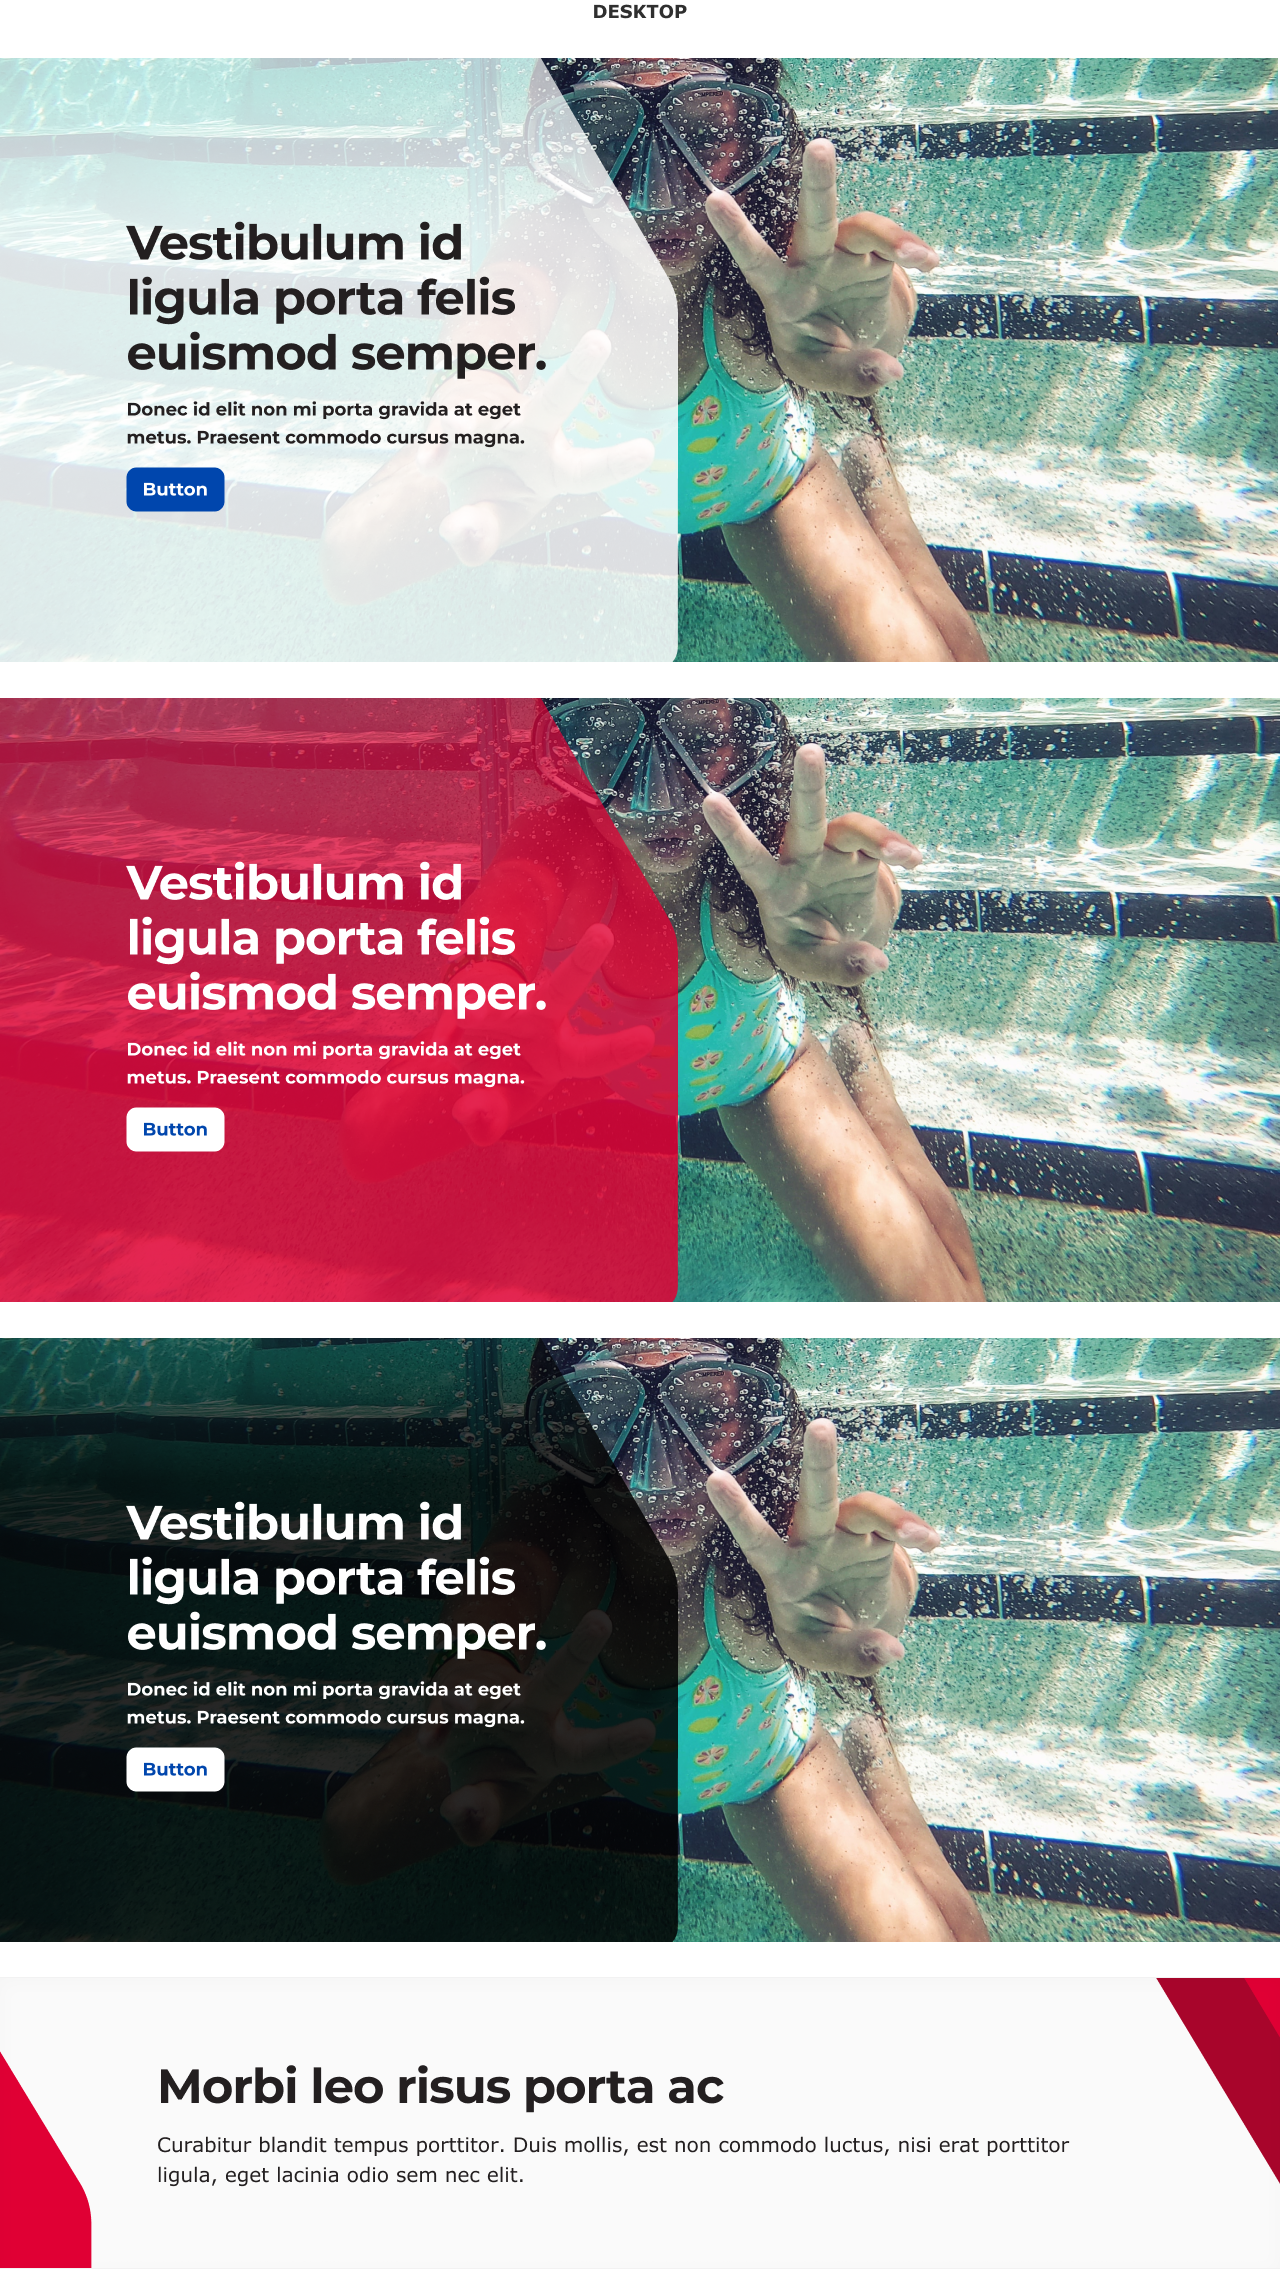
The Canadian Colorway for Banners package contains 4 banner variations that utilize the unique Y Canada chevron:
Black
Red
White
Short (no image, title and subtitle only)
These can be selected in the
Y Styles selector for each banner on your site.
Y Canada sites can also use the existing “Overlay” Banner style as it does not utilize any YUSA-specific styling.
Setup
Enable the required modules
Warning
Enabling ws_colorway_canada immediately changes the site logo from the Y-USA logo to the Y Canada logo. It is strongly recommended to perform this action on a development environment first.
To enable the Canadian colorway:
Visit Admin > Extend (admin/modules).
Enable the following modules (search for Canada):
Layout Builder - Canadian Colorway (ws_colorway_canada)
Y Layout Builder - Canada Colorway for Banner (lb_hero_canada)
Alternatively, enable the modules via drush:
drush en ws_colorway_canada lb_hero_canada -y
Configure Site Defaults
After enabling the new colorway, follow these steps to ensure the new colorways are used across your site:
Y Canada site developers may want to hide the existing YUSA styles to prevent unintentional usage. While there isn’t a configuration option for this, custom CSS can achieve this:
Enhance your site’s security by enabling multi-factor authentication (MFA) for user roles.
Multi-factor authentication (MFA), also known as two-factor authentication (2FA or TFA), provides an extra layer of security for your site. It can be enabled for specific roles, such as administrators, while allowing other users to log in with just a username and password.
The community-contributed
TFA module is the recommended way to implement MFA.
Requirements
The TFA module requires the PHP OpenSSL extension, which is typically included in modern PHP stacks. You can verify its installation by running:
php -i | grep openssl
To install the TFA module and its soft dependency, use Composer:
composer require drupal/tfa drupal/real_aes
Installation and Configuration
Install the module: Use the command-line instructions above, or install via the Extend page /admin/modules.
Encryption Key and Profile: Follow the instructions in the TFA module’s README file for your branch:
These files will walk you through setting an encryption key and an encryption profile.
Enable TFA: Go to Admin > Configuration > People > TFA (/admin/config/people/tfa) and enable the module.
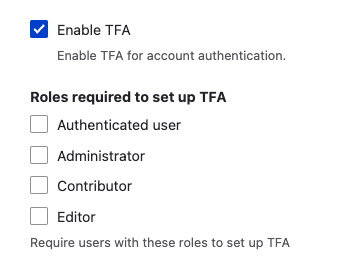
Configure Roles: After enabling TFA, you can require it for specific roles on your site.
Basic Authentication and MFA
It is important to note that enabling TFA does not disable basic username/password authentication. Users without the roles required to use TFA will continue to log in as normal. Users with roles that do require TFA will first enter their username/password, and then will be prompted for their MFA code.
Security Considerations
Basic Authentication for Web Services: Be aware that modules like
Basic Authentication use HTTP Basic Authentication, which transmits usernames and passwords in plain text (though base64 encoded). While Basic Authentication provides a way for web services to authenticate, it is crucial to secure the connection using HTTPS (SSL/TLS) to encrypt the transmission and prevent eavesdropping. Consider using other authentication methods, like OAuth, for improved security where possible.
Permissions: The core User module allows users to register, log in, and log out, and administrators to manage user roles and permissions. The core Ban module allows administrators to ban certain IP addresses from accessing the site. Ensure that permissions are properly configured for each role to maintain a secure environment. Grant permissions only to trusted roles, especially those with security implications. Periodically review the permissions assigned to each role at Admin > People > Permissions (/admin/people/permissions).